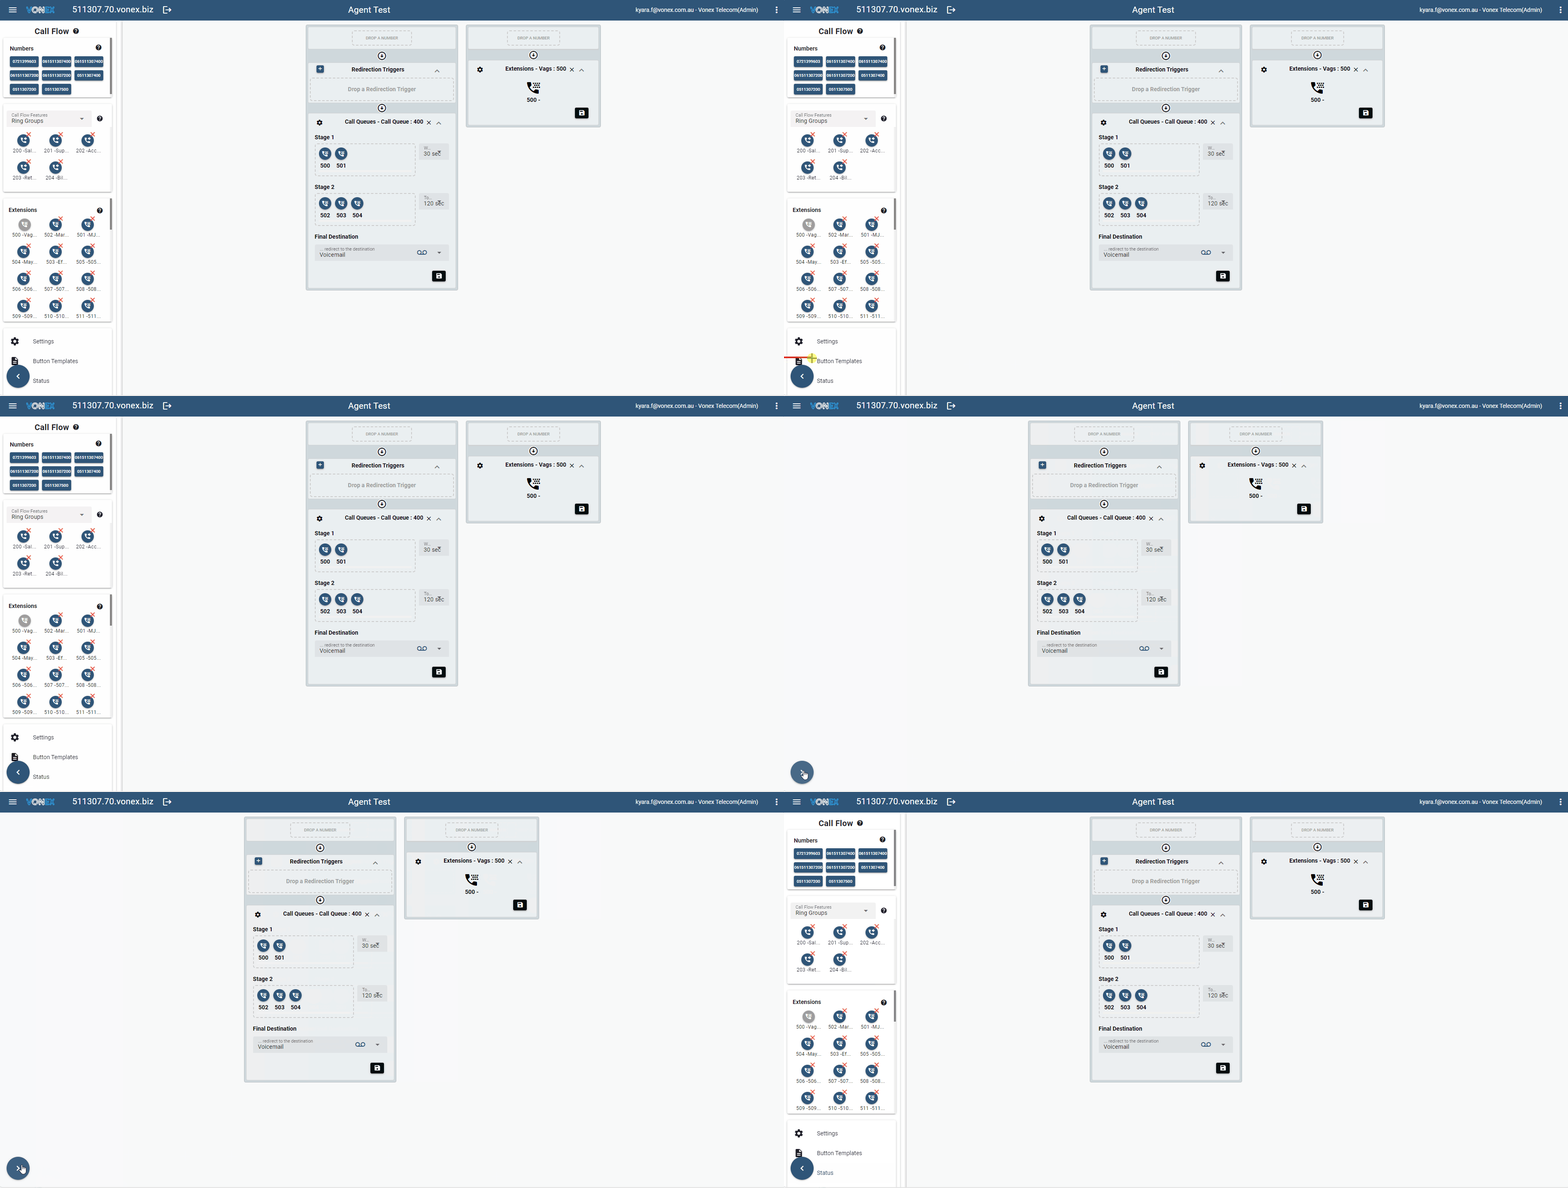
# Call Flow
Your Business Phone System will be provisioned and initially configured by your service provider.
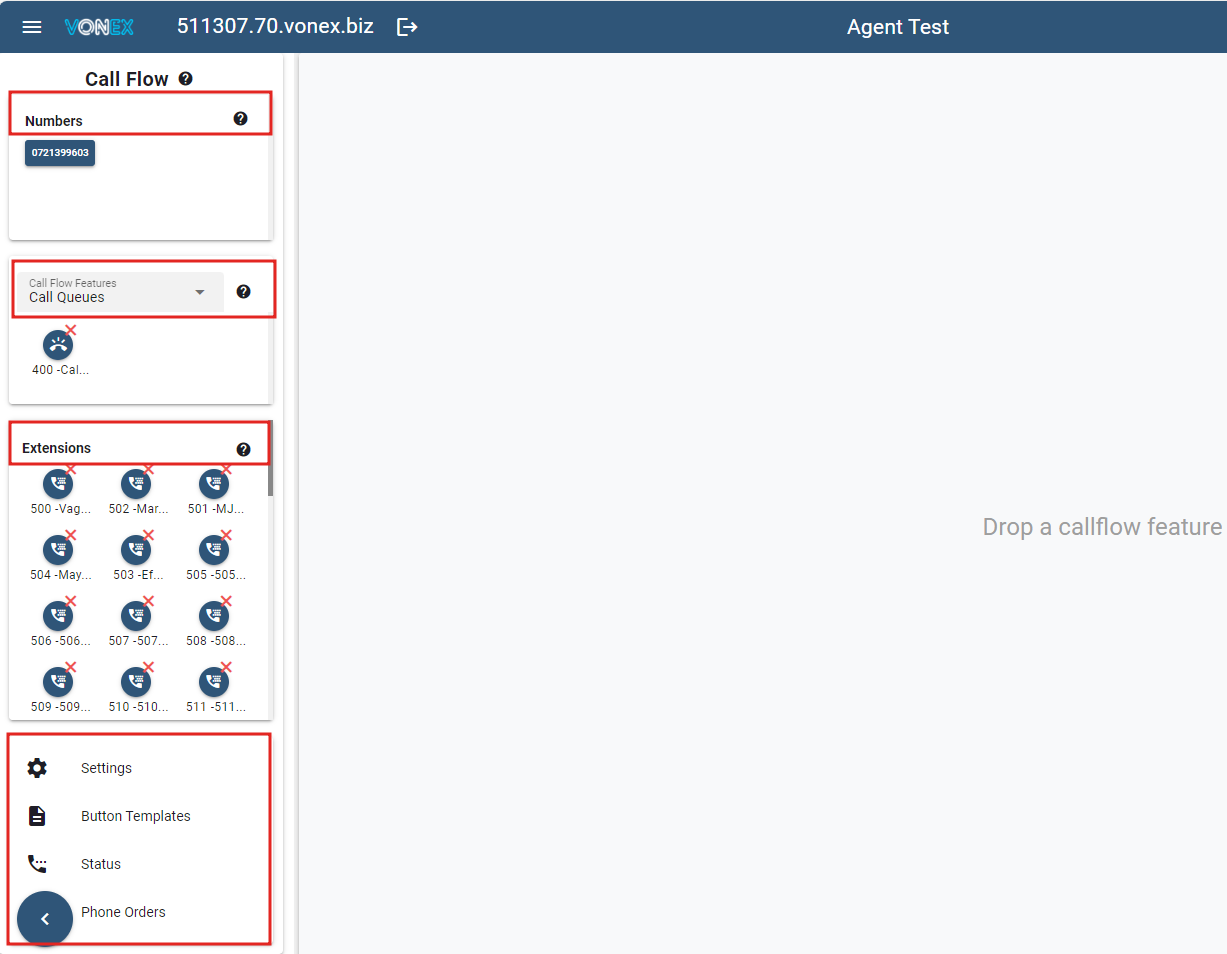
Your Business Phone System configuration comprises of Phone Numbers, Extensions and Call Flow Features.
The Call Flow page is a visual representation (see diagram below) of your Business Phone System configuration. It uses "Drag and Drop" technology to enable you to manage the configuration.
Phone Numbers.
Extensions:
- account range (500, 501 .......)Call Flow Features (from drop-down menu):
i. Call Queues
- account range (400, 401 .......)ii. Ring Groups
- account range (200, 201 .......)iii. Auto Attendants
- account range (100, 101 .......)iv. Redirection Triggers
- account range (700, 701 .......)
Note - accounts are a unique 3 digit identifier that allows you to configure multiple instances of that feature.
Refer to the documentation for each of these configurable elements.
The Call Flow page also presents information about your Business Phone System:
Settings
General Settings
Music on Hold management
Address Book management
Phone Button templates
Status
Calls and registrations
Call Logs
Call Recordings
Phone Orders
- Details of all phone orders
Refer to the documentation for each of these elements.
# How drag and drop works
Drag and drop is a graphical user interface that enables you to select an Extension or Feature and drop it onto the canvas. The Extension or Feature's options are then presented on the canvas for configuration.
Feature Accounts (3 digit ranges as detailed in the Call Flow page above) enable you to configure multiple instances of that Feature.
Select a Call Flow Feature or Extension.
Click the Account you want to configure, hold down the mouse button. (example below is for a Call Queue).
Drag the Account and place it in the blank canvas (in the Drop a callflow Feature area) by releasing the mouse button.
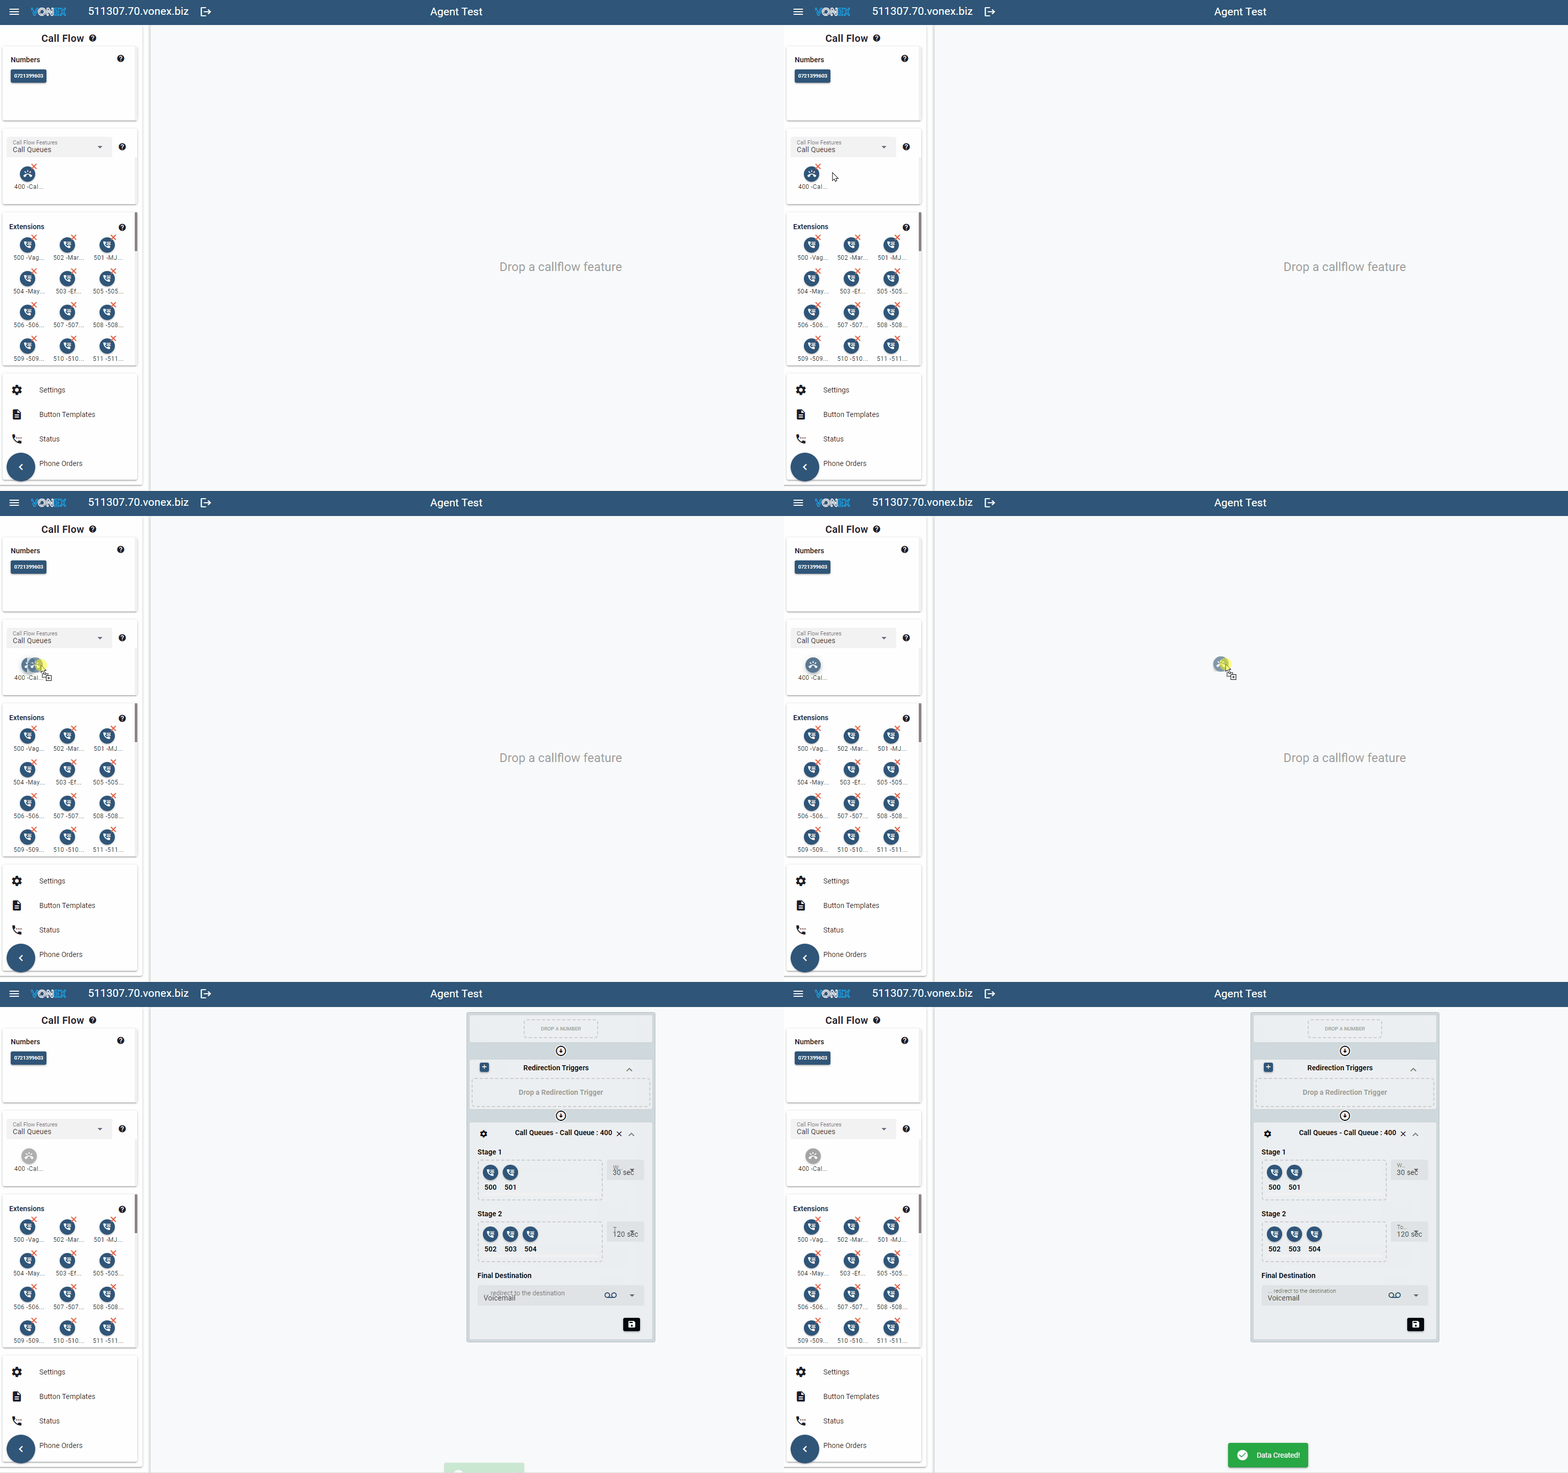
Once the Account is on the canvas you can configure it. Refer to the documentation for each of the Features to assist with configuration.
** If you are using a touch screen device you will need to touch and hold the Feature, drag it to the canvas and then release it.
# How to remove a Feature Account from the canvas
If the Account has no phone number assigned proceed to Step 2 (below).
If the Account has a phone number assigned to it, you will need to remove the Phone Number before you can remove the Account from the canvas.
Click the "x" icon next to the number within the feature account.
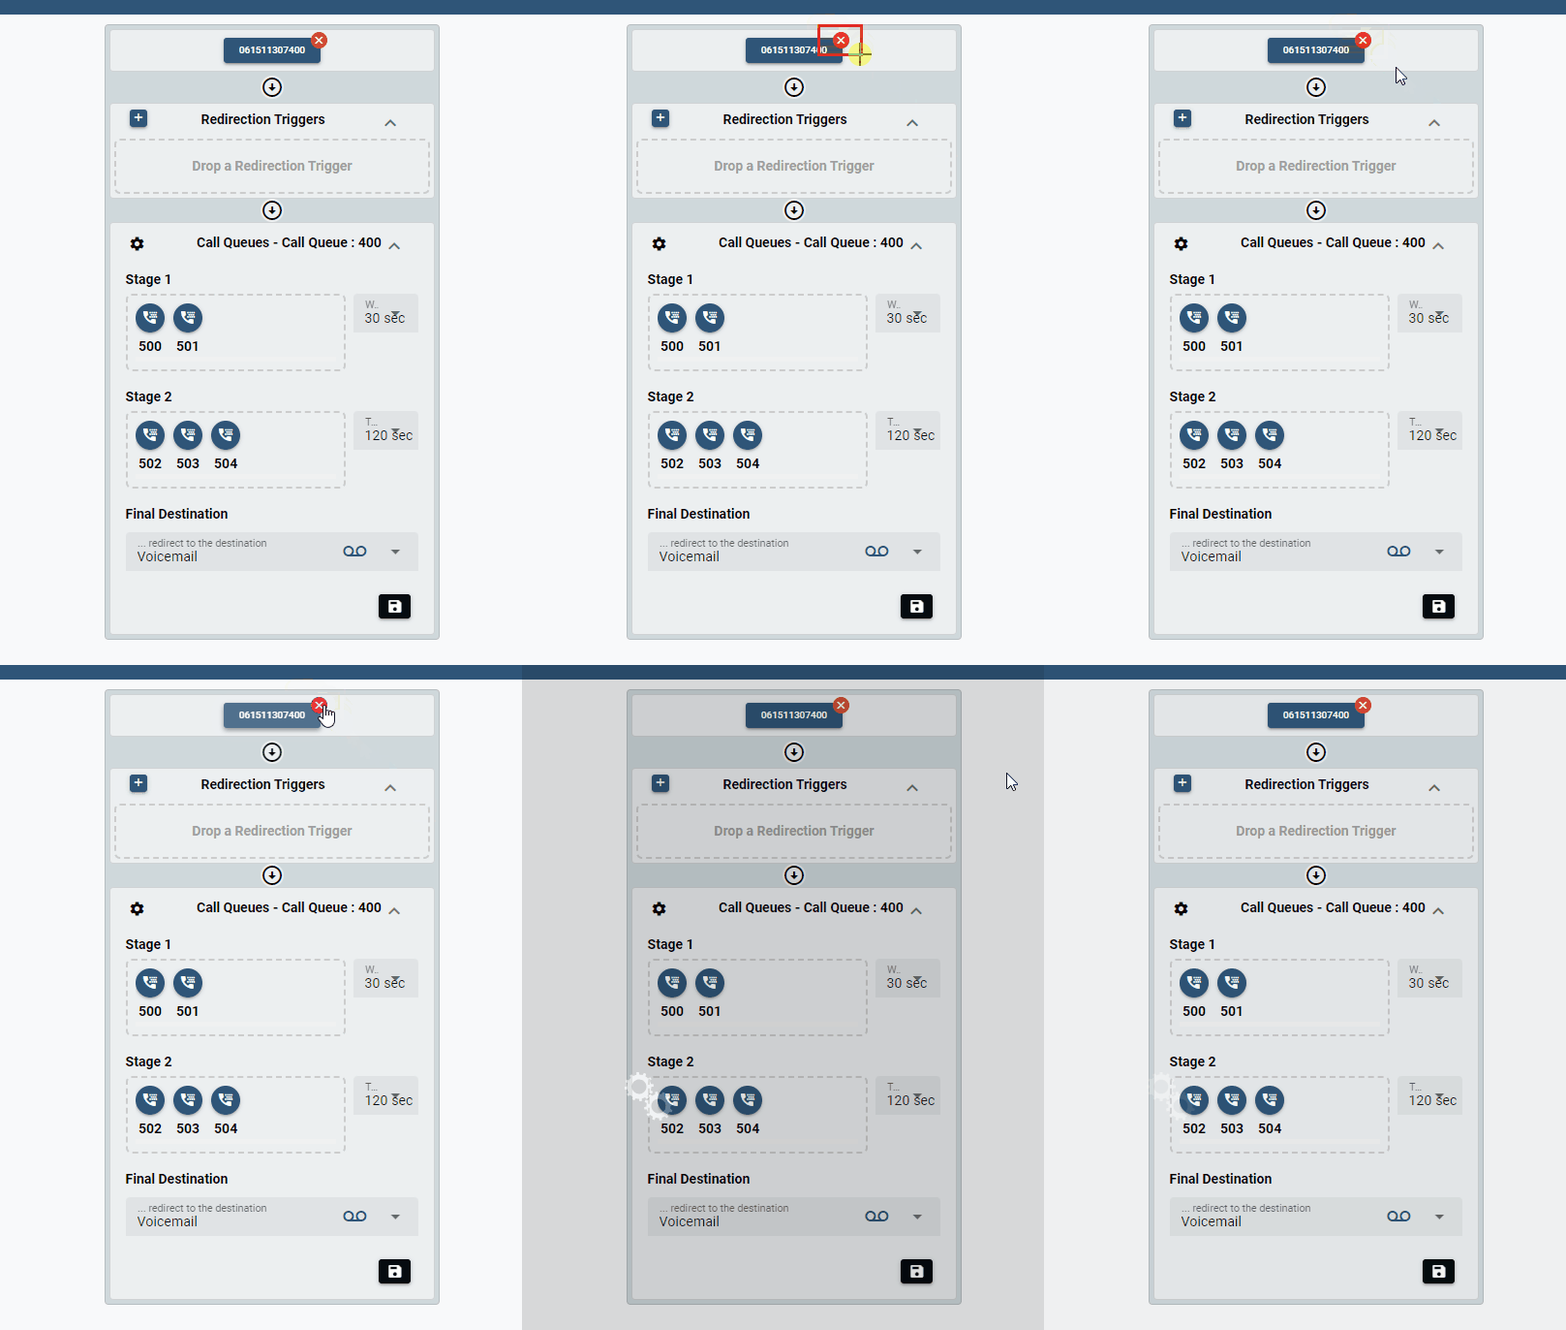
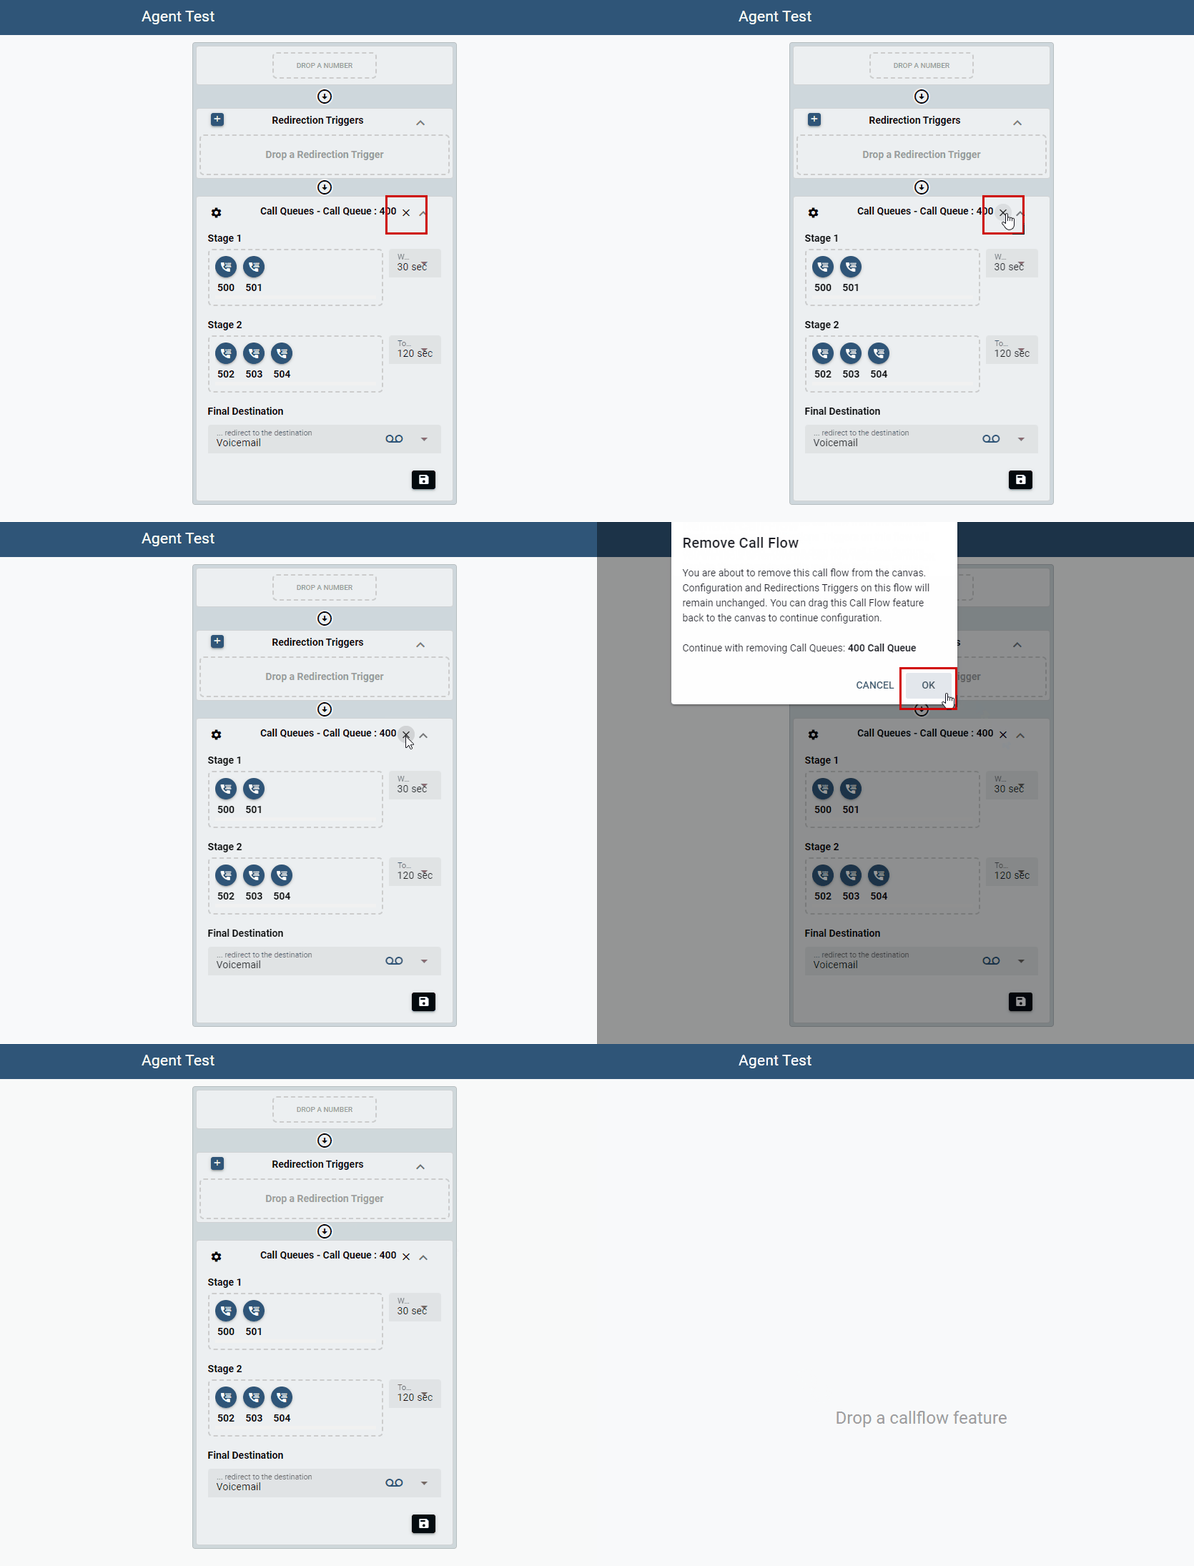
When there is no Number on an account a delete icon will appear beside the Account Name. Click the "x" icon on the Account.
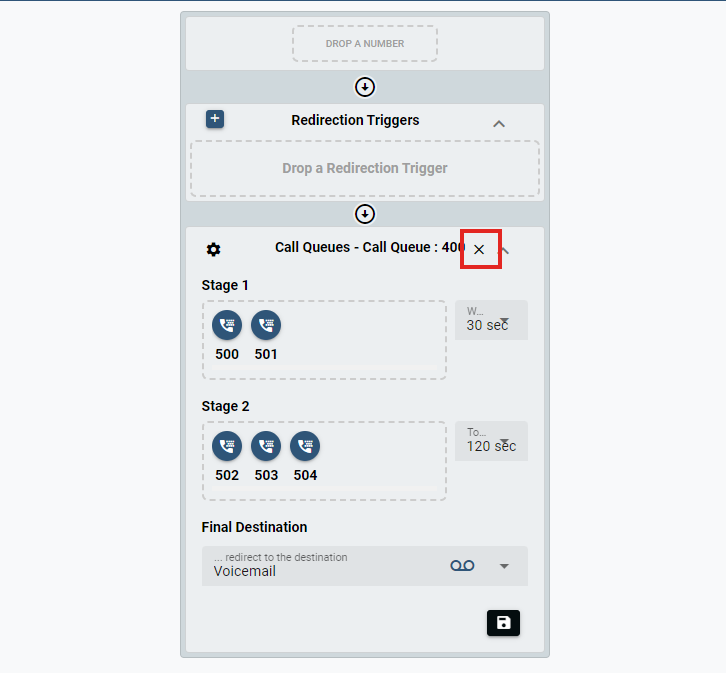
A prompt will appear requesting confirmation to delete the Account. Click "OK" to remove it from the canvas.
Please note that even if you delete the Account and remove it from the canvas it will retain the configuration.
# Sidebar
The following symbols are used to collapse or expand the Sidebar.
and
Click the symbol to expand the sidebar and view the menu.
Click on the symbol to collapse the sidebar and expand the canvas for a better visual representation of a complex call flow.
