# How to Configure Call Queues
A Call Queue routes incoming calls to a predefined group of Extensions (called agents when in a queue). The incoming call is directed to an available agent. If all agents are busy the call is placed in the queue. While waiting in the queue, callers can hear hold music or pre-recorded announcements.
Call Queues have a wide range of features and monitoring methods.
By default, agents are logged into the queue. Agents can log themselves in and out of the queue. If logged out or if the agent has do-not-disturb (DND) enabled, the agent remains a member of the queue but calls will not be routed to them.
Call Queues use the account range (400, 401 .......) each account defines a unique call queue, allowing you to set up multiple cal queues.
Call Queue accounts can be added to your Business Phone System by your service provider.
The following instructions detail how to configure a Call Queue.
# Configuring a Call Queue
Configure the Redirection Triggers.
Redirection Triggers take priority on the Call Queue.
Any enabled Redirection Trigger will be actioned before the call is placed in the queue. The following buttons show whether a Redirection Trigger is enabled or disabled.
 Redirection Trigger enabled.
 Redirection Trigger disabled.
The default Redirection Triggers in order of priority are:
- Forward All Calls
- Public Holidays
- After Hours
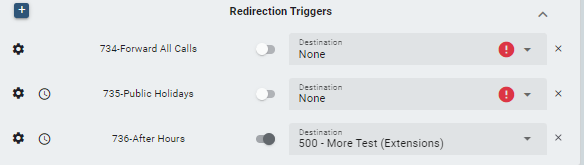
In the example above only the (736) After Hours Redirection Trigger is enabled.

736-After Hours is the name of the Redirection Trigger account.
- shows that the Redirection Trigger is
enabled.
Destination is a drop-down box listing the redirection Destination options (in this example to Extension 500).
Click on the Down Arrow
 to list the Destination options.
If the Destination is None the
 symbol will appear -- there is no destination set.
Click on the
 button to remove the Redirection Trigger from the Call Queue.
 Click on this icon to Edit the Redirection Trigger.
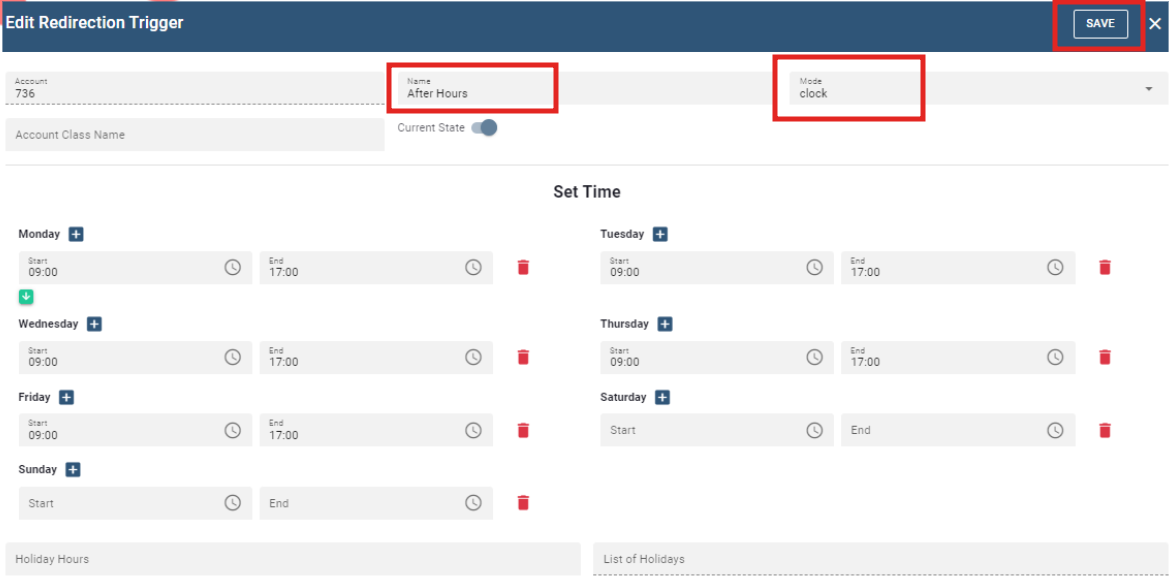
This Redirection Trigger is named After Hours.
This is a Clock (Time Based) Redirection Trigger.
Click the Save button on the top right of the page.
For more information on Redirection Triggers please refer to How to Configure Redirection Triggers.
To add additional Redirection Trigger options, click on the
 icon.
icon.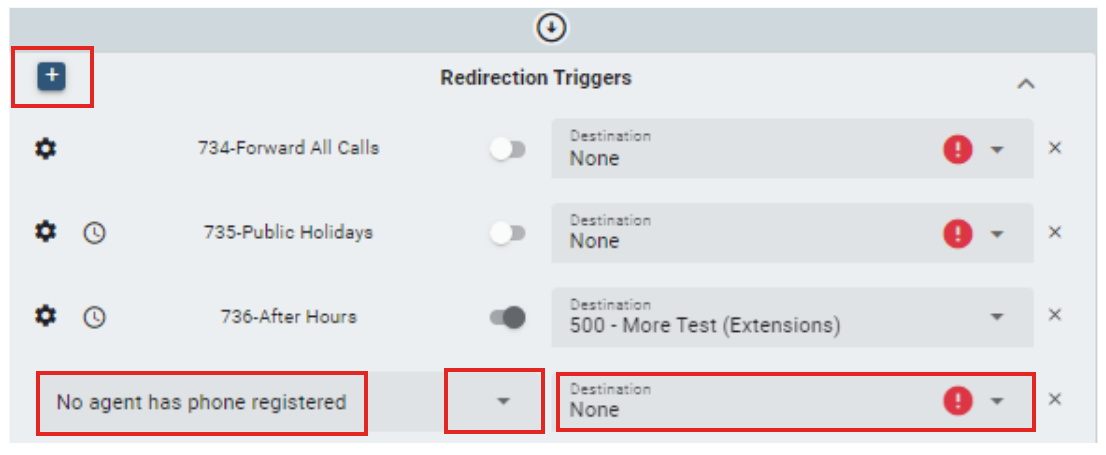
A drop-down box will appear.
Click on the
button to list the additional Redirection Trigger options:Always; All Primary agents are logged out; All agents are logged out; No agent has a phone registered; All agents busy; Caller in address book.
Select the Redirection Trigger you would like to configure.
Click on the
button to list additional Redirection Trigger Destination options.Select the destination for the new Redirection Trigger.
After the Redirection Triggers are configured, you can configure the Call Queue Basic Settings.
Click on the
 icon to configure the Call Queue
Basic Settings.
icon to configure the Call Queue
Basic Settings.
An alternate method to update the Call Queue is to Double Click on the Call Queue account from the list of Call Queue accounts.

- Edit the Call Queue Basic Settings.
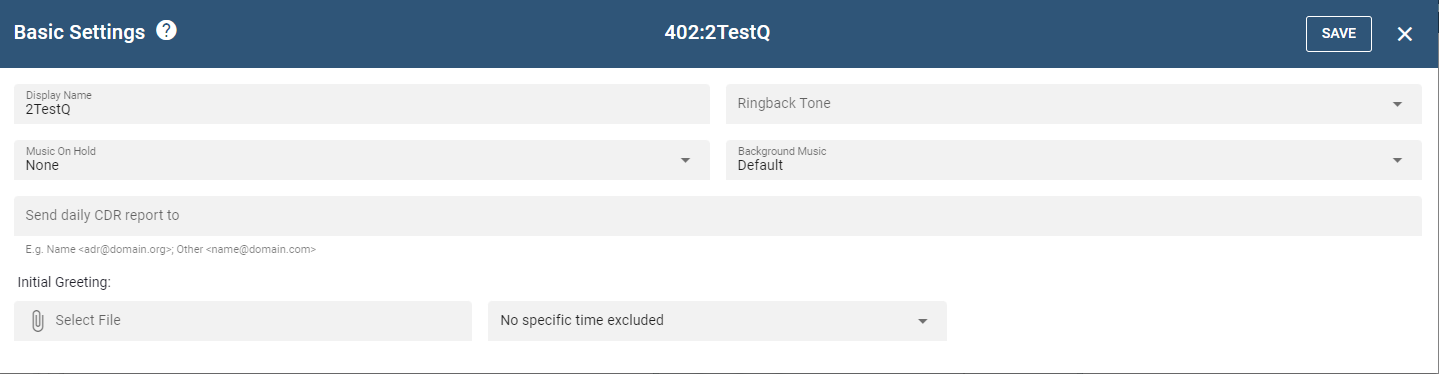
Display Name: the Call Queue name. Use a meaningful name to assist in easily identifying your Call Queues.
Ringback Tone: Drop-down options of Regular Ringback tone when the agent's extension rings or No Ringback tone continue playing music until the agent answers.
Music on Hold: Drop-down list of available music or pre-recorded announcements.
Background Music: Drop-down list of Mute levels.
Send Daily CDR reports: The list of all the daily calls into the Call Queue. The report is sent nightly at midnight to the email address listed in this field.
Initial Greeting:
Select file: Select your pre-recorded announcement for the greeting the caller will hear when they first enter the Call Queue.
Drop-down next to Select File: Drop-down list options for initial greeting will be Always played or only when a Redirection Trigger is selected.

Click the Save button on the top right of the page.
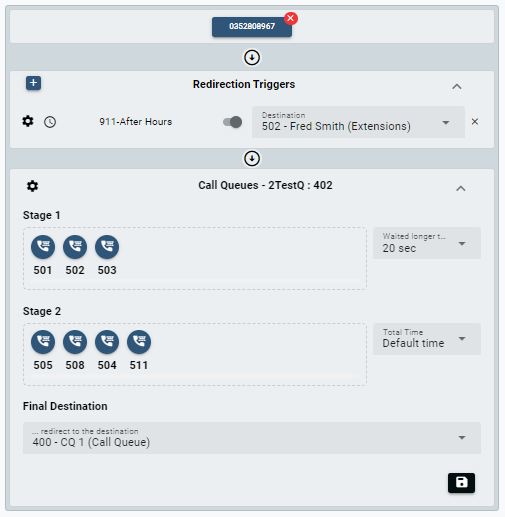
- Configure the Call Queue Stages and Final Destination.
- Drag the Agents extensions to the Drop an Extension field.
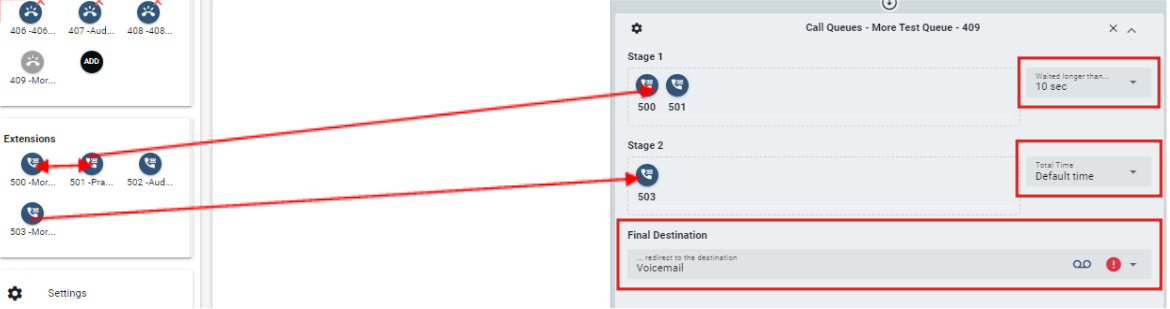
Stage 1 Waited Longer than: From the drop-down list select how long the call should be queued in Stage 1 before it progresses to the next stage or the final destination.
Stage 2 Total Time: From the drop-down list select the total time the call should be queued before it progresses to the next stage or the final destination.
Final Destination: From the drop-down list select the final destination.